Saturday, November 20, 2010

Mar Sara Mission 3: Zero Hour


Achievements:
Hold the Line: Complete the "Zero Hour" mission on Normal difficulty without losing or salvaging a structure.
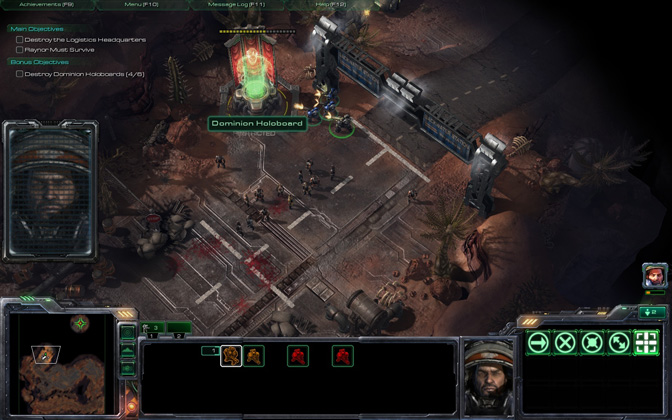
Zero Hour: Complete all mission objectives in the "Zero Hour" mission.
The Best Defense...: Destroy 4 Zerg Hatcheries in the "Zero Hour" mission on Hard difficulty.

This is a easy mission to beat. Unfortunately, the achievements not so much. For the sake of trying to complete everything, I tried to go for it all. Then I gave up on Hold the Line. And then The Best Defense too. Maybe I haven't gotten a good rhythm down. I'll try mission again, and if I can get the achievements, I'll post my results.

When you start, send your SCVs to mine minerals and queue 2 SCVs at your command center and rally them to your minerals. Start building a tech lab at one of your barracks. Train a marine at the other.


You are given two bunkers on your base platform, and another guarding each entrance further out. Part of the reason Hold the Line is so difficult is that you have to work with such terrible initial placement. I would NEVER have built there.

In the beginning, you are also given 8 marines next to each bunker. Fill the bunker on the left side only. The first two enemy waves come from this way. Bring the rest of the marines down, to defend against the wave.

When your tech lab finishes, you want to train a medic and another marine from your 2 barracks. In the meantime, you should also be training additional SCVs, and making supply depots. Gas is important, but not as important as getting your mineral line set up. You can be lazy with the gas.
After you defend against the initial waves, send your free forces towards the right. If you haven't been already, you will be alerted to some troops calling for help. Rescue them and collect the resources. Beware the zerg units that are burrowed. There are two groups of zerglings and and a single hydralisk waiting. If you are lazy, the hydralisks will eat at least one of your marines.

Queue 2 more medics, and start building a refinery if you haven't done so. If you have the resources, UPGRADE! Do both. +1 dmg and +1 armor is huge when playing brutal. All the zerg units are upgraded, and so should yours.
And, you should be off to a good start. rescue the other rebels when you are alerted to their presence. If you go to their locations early, only the resource pallets will be there. After having rescued the 2nd group, I decided to try assaulting one of the Zerg bases.

Yeah. The bases are very well protected, and marines and medics just don't cut it. I stayed just long enough to see a ultralisk unburrow itself. So, my advice- don't attack the Zerg bases. Unless you have a gazillion extra forces.

Having failed at my assault and leaving my base ill-defended, I ended up losing a turret and a bunker or two. That should give you an idea of how easy it is to fail at two of the achievements. Save the last group of marines on the left side of the map if able. I then immediately salvaged all bunkers, (including the ones on the higher platform,) and barricaded the entrance with supply depots.

If you build as flush to the entrance as possible, you'll notice that 4 supply depots are a very good fit, and that they leave a small opening for zerglings to be able to fit through. Because of AI mechanics, this is where zerglings will attempt to run through, instead of attacking the depots. Score! Build bunkers behind, and more units. Wait it out until the end of the mission.
You can build like this for the get go, but since I tried to get all the achievements (and failed), I tried to preserve the current set of buildings. If you do decide to barricade yourself, it makes for a VERY easy game

Friday, November 19, 2010

Mar Sara Mission 2: The Outlaws

In this mission, you'll be expected to maintain an economy capable of producing units.

Still, it's not too difficult of a mission, and you don't have to worry too much. Even the achievements are reasonable.

Achievements:
The Outlaws: Complete all mission objectives in "The Outlaws" mission.
Cash Reward: Collect all Mineral and Gas Pallet pickups in "The Outlaws" mission on Normal difficulty.
Be Quick or Be Dead: Complete "The Outlaws" mission on Hard difficulty in less than 10 minutes.

Of the three, the last one is probably the only one you should have trouble with on Brutal. The Dominion forces will assault your base pretty aggressively, so you will want to build up your forces quickly.

In addition to the marine, you now have medics at your disposal.

You will start the game with some SCVs by your command center. Get them to mine minerals immediately. I personally like to split them into 2 groups, one for the top and others for the bottom. (Rather than letting them auto-mine.) I like to think it gives me a couple extra seconds of mining. :) Queue 2 SCVs in your command center, and direct it to minerals as well. (Right-click on the minerals)

With the marines you have above your base, immediately start heading up. There will be a couple pallets that give you 100 of each resource. Score!

Start building a techlab on the barracks you start with. A techlab costs 50 minerals and 25 gas, leaving you enough to produce a medic as soon as it is finished.

You want to end up with at least 15 scvs on minerals to maintain your army growth. Try to have 1 SCV queued until you get there.

Don't get supply locked. For this mission, try to stay at least 5 supply above your current count at all times. Before the tech lab finishes, pull a SCV off your mineral line and build a supply depot. Each depot provides 8 supply for additional units.

After the techlab finishes, you want to queue a medic immediately. Once your supply depot is done, send your SCV to build a barracks.You'll want to have 4-6 barracks producing marines constantly, once you get your economy rolling.
Pull another SCV off your minerals and start building a Vespene Refinery. He will start harvesting gas as soon as the structure is finished.
Now, the key to building your army efficiently is to create more units without queueing more than a single one at each building at a time. Otherwise, you are wasting minerals that may be better spent on additional barracks, or increasing your rate of mineral gain by making more SCVs.

If you have the money for it, stay on top of your supply, and build more barracks for additional troop production. Around this time, 6 or so Dominion marines will attack your base. Keep an eye on your medic, and you should be fine. On brutal difficulty the computer AI places a high priority on healing medics and repairing SCVs. After you fend off the attack, send your forces North of your base. You will find a few marines and a medic guarding some mineral pallets.
After you kill the Dominion forces and collect the minerals, you will want to make your way down the path. Don't forget to queue more units while you do this. It is essential that you maintain your troop production. Queue them to your current location, or better yet- queue them to one of your medics. This way, reinforcements will always come directly to where your army is. Don't forget to maintain your supply depots!
You will be alerted of a rebel base that is being attacked by the Dominion. Rescue them, and you'll get some extra troops and another barracks to produce out of. There are two groups of marines blocking your way.
It's inevitable that there will be troop losses, but if you try to pull back the ones that are injured, it will make a very significant difference, especially with medics. Rescue the rebels and they will join you. Collect the 4 resource pallets in this area. You will most likely be hit by a Dominion assault of a medic and some marines around now.
Move your army forward, and they will be greeted by 4 Dominion Hellions. You should not have too much trouble with them, as long as you have 10+ marines with medics. (Are you remembering to produce units?)
If you are playing slow, you may be hit by an Dominion assault while you are moving forward. If it looks like you'll lose, pull back to the rebel base. The higher ground grants you an advantage.
After the hellions, you want to have at least 15+ marines in your group before you tackle the bunker. Otherwise, you'll take too long bringing it down, and you'll most likely lose more troops than you want to.
Once you bring down the bunker and the marines inside, approach the Dominion base. You should notice that the Dominion forces are rallying at the opening of their base. To make the battle MUCH EASIER, initiate the attack, but right after that, pull back a bit. The Dominion marines will follow you, but their annoying medics will stay behind, allowing you to pull them down with ease.

After that, you want to destroy the buildings as fast as you can, starting with the barracks on the left. Each enemy unit that is produced will slow down your attack. But beware: There is a siege tank on the right side of the base, above their factory. It will do a lot of damage to your clumped army. Either stay out of range, or attack it head on and deal with it right away.


Clean up any remaining buildings and you're done with mission 2!

This game I played rather lazy, and I got 10:02 on brutal. If you decide to play more carefully than I did, getting the under 10 minute achievement is very doable. You can always replay the mission later on a lower difficulty to get any unclaimed ones.

Thursday, November 18, 2010

Mar Sara Mission 1: Liberation Day

This is very first mission you are introduced to. Not a very difficult one, even on brutal, but you can't be lazy when you play.

Achievements: 
Raynors Back: Kill 5 enemy units in the "Liberation Day" mission with Raynor on normal difficulty.
Liberation Day: Complete all mission objectives in the "Liberation Day" Mission.
Down with Mengsk: Kill every enemy unit in the "Liberation Day" mission on Hard difficulty.

The achievements for this mission, fortunately are very doable on brutal without making any concessions. You start with 6 marines, with one of them being Jim Raynor. And of course, he is stronger than the others. (Leaders always get the best gear!)
Start by having them follow the road down. There will be a civilian that says, "Don't go that road". (Yeah. accented English exists even in the Korpulu Sector.) Shortly after, as the road begins to curve up, there will be 3 enemy marines blocking your way, with another a bit off to the side. You don't really have to use any strategy at this point. Just attack move into their direction, and your troops will do the rest. Now, do note that you NEED to watch your marines HP.
While the initial 3 enemy marines + 1 isn't something you need to really worry about, on brutal, they WILL kill one of your marines if you don't watch them. The enemy is upgraded, and likes to prioritize dying targets. Be sure to pull back any dying marines.
After you dispatch the 4 marines, continue up the road and you should see a hologram you can destroy for the achievement. 5 more to go! You should still have 6 marines at this point. If you've already lost one, restart the mission. It's not worth the time to try and beat the rest of the mission handicapped.
There's 2 marines up the road after the Mengsk hologram. Lead with your healthier marines and attack them. Continue down until the road turns into the wide lot. You may want to save at this point.
After you move in a little closer, the game will alert you to a large group of enemy marines ahead. That is when Raynor will call for some ill-placed reinforcements. Do not let them attack from where they land. You will end up losing marines you want to preserve.
As your first group attack-moves into the fray, you want to move your reinforcements towards the right side of the screen, away from the 2 marines standing by the hologram. The key is to get out of the aggro range of those two marines before you start attacking the others. After killing the larger group, finish off the two by the hologram.
Your forces will undoubtedly take losses, but you will hopefully end up with more marines than you started with. Ideally, you should have 2-4 extra marines. If you do, you're in good shape for the rest of the level. After you blow up the hologram, you will see another hologram by you, with 3 marines close by. If you're in good standing, (extra marines,) you can engage the 3 marines and destroy the hologram. I recommend leading with Raynor to soak up damage.
There's another hologram to the bottom right, unguarded.  After destroying that one, you may want to save again. There are a bunch of enemy units ahead, and you don't want to lose Raynor by accident.
The dominion marines are watching over some civilians. Just send your marines at them, and make sure Raynor doesn't die. As long as you can preserve 2 marines with Raynor, you'll be fine. While it's not too much of a problem, after you dispatch the marines you should know that the vehicle the civilians are boarding will attack you as well.
Destroy the hologram after you destroy the truck. There are more civilians, and another hologram to destroy a little further ahead. At this point, if you start to advance forward, the civilians will rally behind you and charge towards the Dominion base with you.

The reason you only need 2 or 3 marines left, is that after the civilians have been rallied, they will fight with you, and soak up TONS of damage that normally your marines would take. Move up far enough so that the civilians charge, but do not engage the enemy until the civilians attack first. There will be a firebat and a few marines which should be no problem for your combined force.
After those enemy units die, the civilians will attack the two structures to either side of you. The thing you need to watch out for- most of the civvies will attack the statue since it is closer. The rest will attack the pyramid structure. The statue blows up pretty quickly, and those civilians will charge forward where they will engage the enemy.

This is bad because the civilians will actually die pretty quickly without support, but if you decide to move ahead with just half the group, you risk Raynor dying when the vikings change targets. It shouldn't be too much of an issue, but you should watch out just in case. Remember to focus fire. After the vikings are destroyed, the main dominion complex falls pretty quickly.
Congratulations, you should have finished your first mission on brutal and all the achievements that go with it.

Wednesday, November 17, 2010

Hello!

This blog will focus on completing ALL SC2 campaign missions on BRUTAL. (Because that's how real gamers roll.) I'll be detailing tips and information about completing missions, with shiny screenshots to boot. You may miss some achievements along the way, but you can always replay missions for those later.

Because we all know, the Brutal Completionist is the only campaign achievement worth getting. :)