This is very first mission you are introduced to. Not a very difficult one, even on brutal, but you can't be lazy when you play.
Achievements:
Raynors Back: Kill 5 enemy units in the "Liberation Day" mission with Raynor on normal difficulty.
Liberation Day: Complete all mission objectives in the "Liberation Day" Mission.
Down with Mengsk: Kill every enemy unit in the "Liberation Day" mission on Hard difficulty.
The achievements for this mission, fortunately are very doable on brutal without making any concessions. You start with 6 marines, with one of them being Jim Raynor. And of course, he is stronger than the others. (Leaders always get the best gear!)
Start by having them follow the road down. There will be a civilian that says, "Don't go that road". (Yeah. accented English exists even in the Korpulu Sector.) Shortly after, as the road begins to curve up, there will be 3 enemy marines blocking your way, with another a bit off to the side. You don't really have to use any strategy at this point. Just attack move into their direction, and your troops will do the rest. Now, do note that you NEED to watch your marines HP.
While the initial 3 enemy marines + 1 isn't something you need to really worry about, on brutal, they WILL kill one of your marines if you don't watch them. The enemy is upgraded, and likes to prioritize dying targets. Be sure to pull back any dying marines.
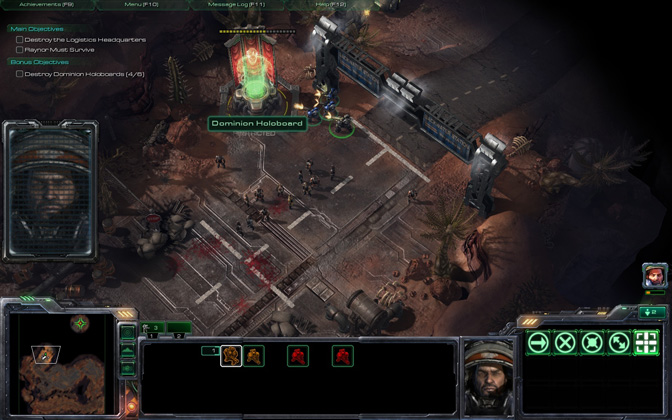
After you dispatch the 4 marines, continue up the road and you should see a hologram you can destroy for the achievement. 5 more to go! You should still have 6 marines at this point. If you've already lost one, restart the mission. It's not worth the time to try and beat the rest of the mission handicapped.
There's 2 marines up the road after the Mengsk hologram. Lead with your healthier marines and attack them. Continue down until the road turns into the wide lot.
You may want to save at this point.
After you move in a little closer, the game will alert you to a large group of enemy marines ahead. That is when Raynor will call for some ill-placed reinforcements. Do not let them attack from where they land. You will end up losing marines you want to preserve.
As your first group attack-moves into the fray, you want to move your reinforcements towards the right side of the screen, away from the 2 marines standing by the hologram. The key is to get out of the aggro range of those two marines before you start attacking the others. After killing the larger group, finish off the two by the hologram.
Your forces will undoubtedly take losses, but you will hopefully end up with more marines than you started with. Ideally, you should have 2-4 extra marines. If you do, you're in good shape for the rest of the level. After you blow up the hologram, you will see another hologram by you, with 3 marines close by. If you're in good standing, (extra marines,) you can engage the 3 marines and destroy the hologram. I recommend leading with Raynor to soak up damage.
There's another hologram to the bottom right, unguarded. After destroying that one, you may want to save again. There are a bunch of enemy units ahead, and you don't want to lose Raynor by accident.
The dominion marines are watching over some civilians. Just send your marines at them, and make sure Raynor doesn't die. As long as you can preserve 2 marines with Raynor, you'll be fine. While it's not too much of a problem, after you dispatch the marines you should know that the vehicle the civilians are boarding will attack you as well.
Destroy the hologram after you destroy the truck. There are more civilians, and another hologram to destroy a little further ahead. At this point, if you start to advance forward, the civilians will rally behind you and charge towards the Dominion base with you.
The reason you only need 2 or 3 marines left, is that after the civilians have been rallied, they will fight with you, and soak up TONS of damage that normally your marines would take. Move up far enough so that the civilians charge, but do not engage the enemy until the civilians attack first. There will be a firebat and a few marines which should be no problem for your combined force.
After those enemy units die, the civilians will attack the two structures to either side of you. The thing you need to watch out for- most of the civvies will attack the statue since it is closer. The rest will attack the pyramid structure. The statue blows up pretty quickly, and those civilians will charge forward where they will engage the enemy.
This is bad because the civilians will actually die pretty quickly without support, but if you decide to move ahead with just half the group, you risk Raynor dying when the vikings change targets. It shouldn't be too much of an issue, but you should watch out just in case. Remember to focus fire. After the vikings are destroyed, the main dominion complex falls pretty quickly.
Congratulations, you should have finished your first mission on brutal and all the achievements that go with it.


No comments:
Post a Comment